AWS Identity Center (IdC) Overview
AWS Identity Center (IdC) is a centralized service making it possible for your users to sign in with their UCSB credentials to AWS Accounts as well as AWS managed services such as Kiro, Transform, and Quick. The Campus Cloud Team populates a directory of users from the Campus’ Identity system and manages users and groups centrally from the university’s Identity System and Group Tagger. The instructions on this page are meant to assist account administrators with integrating the Organization’s Shared instance into these supported services.
https://ucsb-identity-center.awsapps.com/start
The above link can be used to allow users to sign in with their netid credentials (netid@ucsb.edu) via Campus SSO to AWS Accounts and supported Applications.
Logging into an Account
Identity Center can be used to administer console and CLI access to your AWS Account. The role-level access is delegated by the which group tag you have affiliated membership with. For information on how to add and remove users, see these steps. If you add administer access to a user and they don’t see that account populate in their Identity Center, please wait 10-15min for membership to propagate.
Note that each console session is set to a limit of 8 hours, after which you will have to authenticate into Identity Center again.
To administer programmatic access to your AWS Account in Identity Center, simply hit the drop down menu on an account you have access to and select the ‘Access Keys’ menu. Here you will find three different methods to use access keys within to access your account, however it is recommended to use the AWS IAM Identity Center credentials method for any platform (Linux, Windows, Powershell). Find more information at the AWS Documentation.
Implementation with Kiro
Account Owners or users with console access can enable Kiro for use within teams:
- Navigate to Kiro/Amazon Q Developer in the AWS Console.
- Select ‘Setup as Admin’.
- Use Identity Center as identity provider.
- Organization Managed Instance should allow you to search for users (netids) to select for subscriptions.
Once the subscription has been set up, the user can now navigate to https://app.kiro.dev/signin and sign in using the “Your Organization” method. Here, they can enter the ‘Start URL’ which can be found in the management console for Kiro (https://ucsb-identity-center.awsapps.com/start). Be sure to advise users to select us-west-2 for the region, as that is where the shared Organization Instance of Identity Center is hosted.
It should be clear that the configuration and oversight of the Kiro Instance’s settings/guardrails are of the responsibility of the Administrator. Please review the settings page in the Management Console to adjust Kiro and Shared Settings to your liking. Likewise, all subscription costs will be included in your monthly invoice for all resources, paid to your account’s Purchase Order.
Implementation with Transform
To set up AWS Transform simply head over to the AWS Transform service and use the ‘Enable Web Application’ setup wizard. Use the manual setup option, making sure to select AWS IAM Identity Center (IdC) as your User Access method.
A known bug during this process is receiving this message:
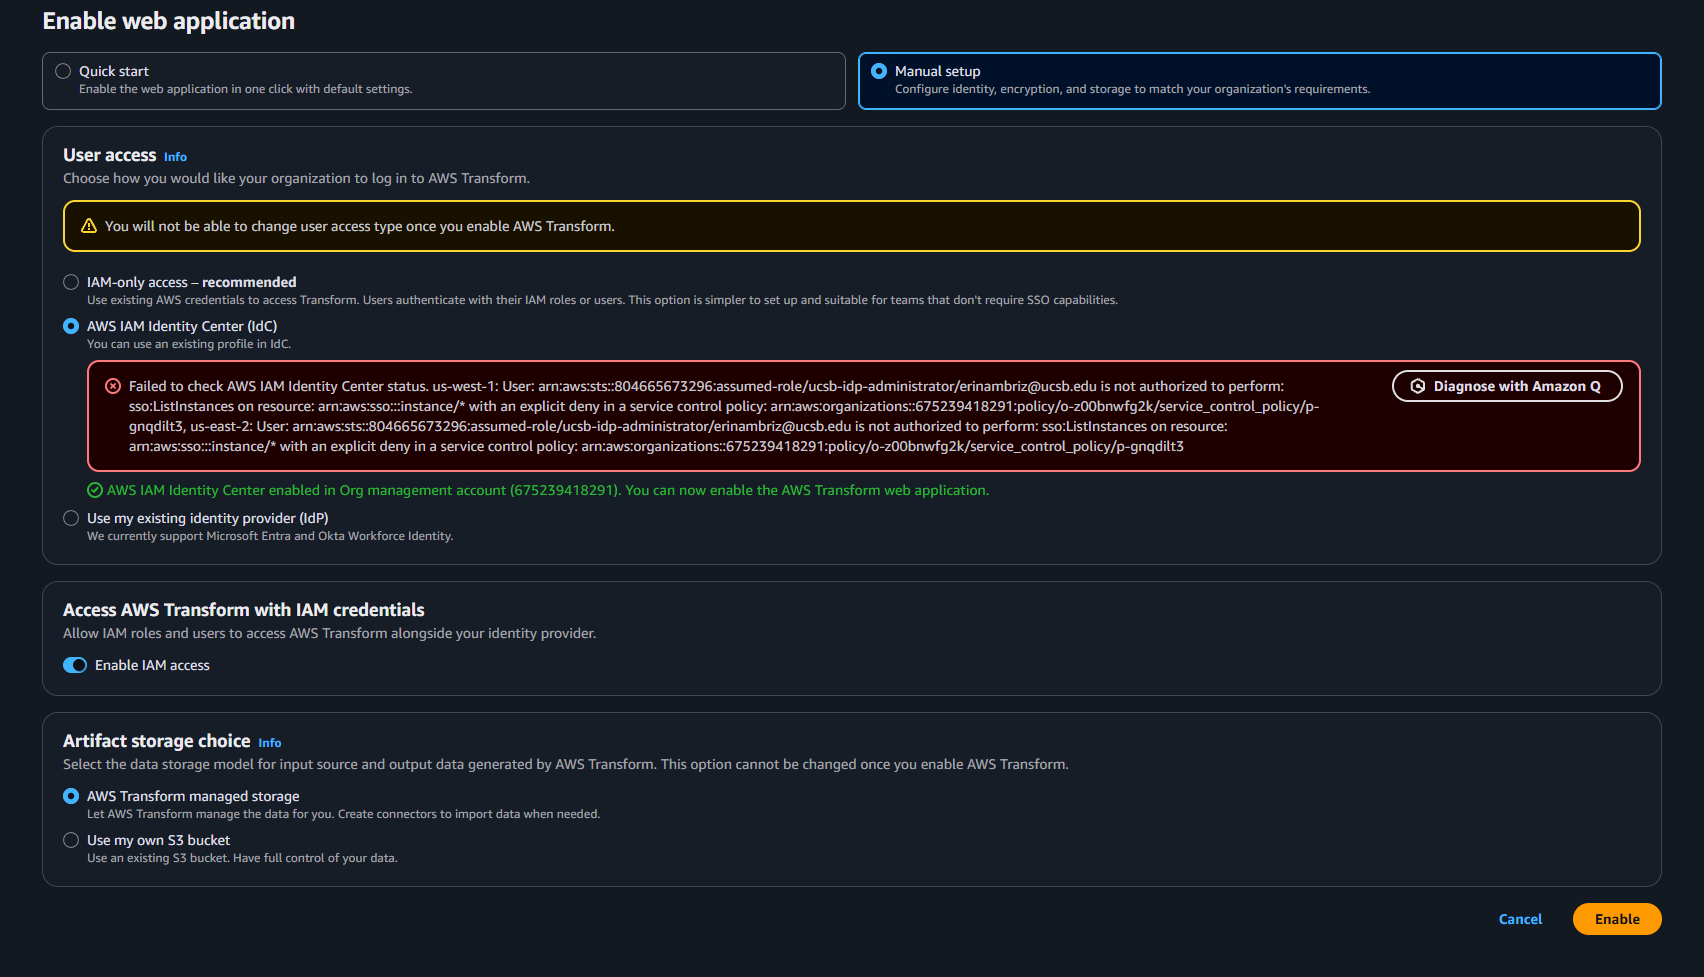
Disregard it, and continue by Enabling the Web Application. Once in the dashboard, you can verify the Organization Instance is active by searching an active netid when adding a new user. More in depth information on using Transform as a service in AWS Transform Documentation.
Implementation with Customer Managed Applications
Account Owners with their own managed applications in AWS that make use of SAML 2.0 or OAuth 2.0 authentication methods can provision Identity Center for provisioning of your users. Refer to the AWS IAM Identity Center Documentation for more information.